Add a location to a logbook entry
What you'll do
Attach a geographic location to a logbook entry so it appears on the event map. Use this for field observations, incident sites, resource positions, or anything that has a "where" worth recording.
Before you start
- You are in an event (named or default) and creating a new detailed entry. Locations can only be added through the detailed entry form, not quick entries
- You have a role with at least Contribute or Edit permission on Logbooks (the built-in Editor role has this)
Steps
-
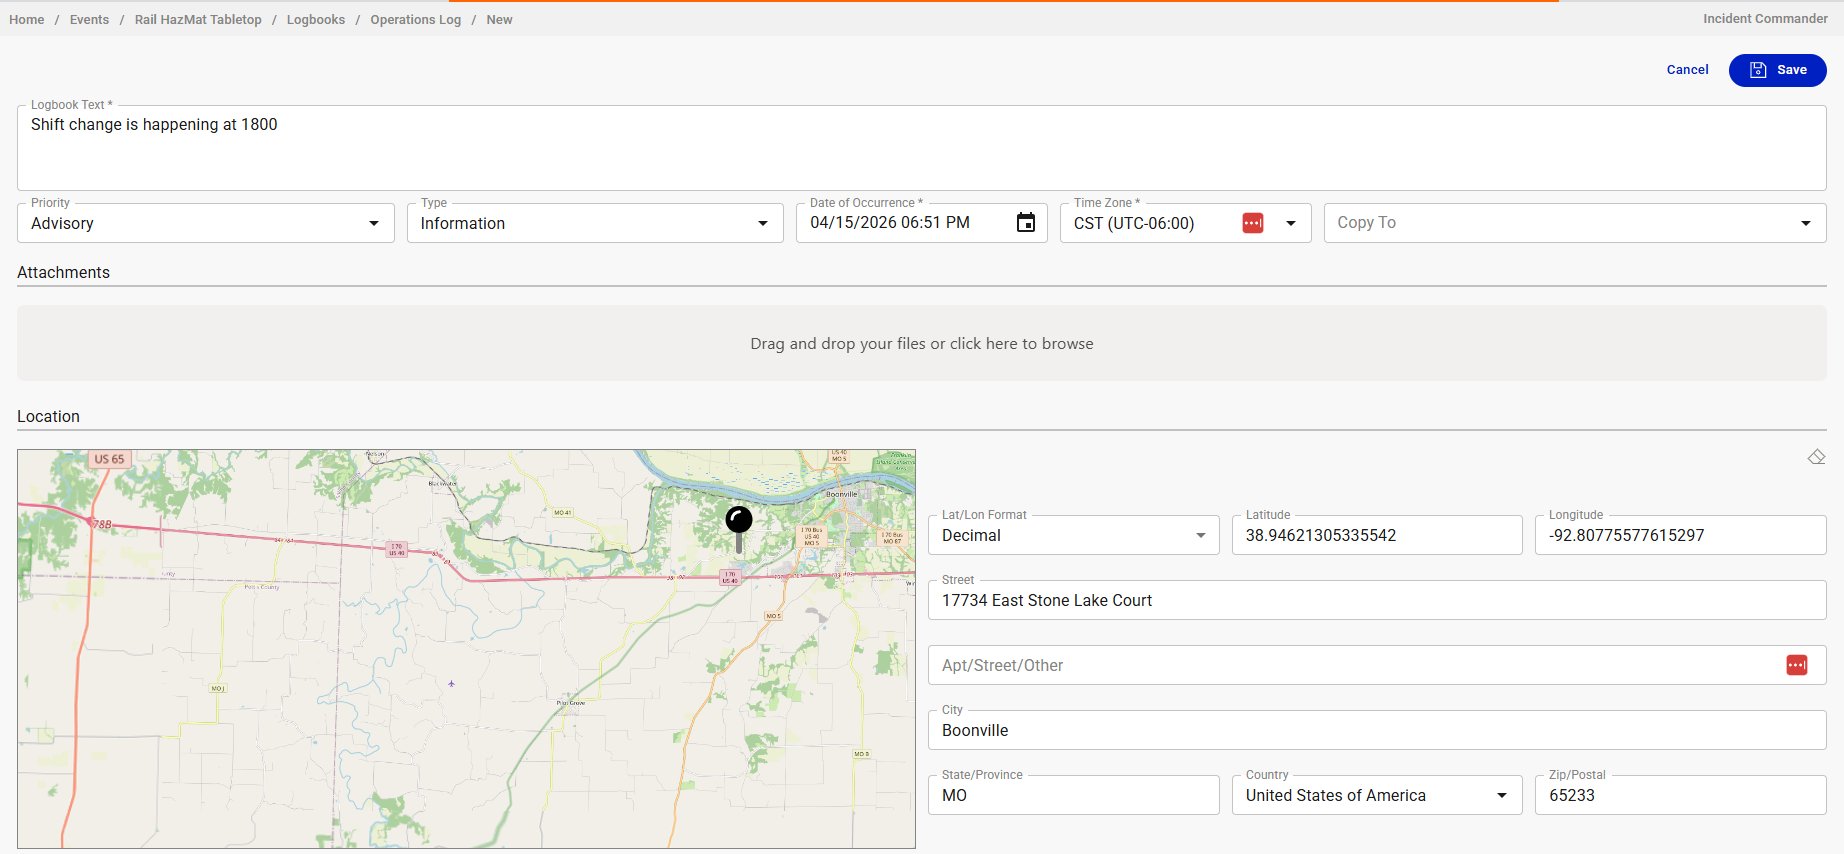
Click + Add New Detailed Entry and fill in the entry text and other fields as needed.
-
Scroll down to the Location section.
-
Set the location using any of these methods:
a. Click the map: click directly on the map to drop a pin. The latitude, longitude, and address fields auto-populate.
b. Enter coordinates: type latitude and longitude in the fields to the right of the map. Use the Lat/Lon Format dropdown to switch between Decimal and other formats.
c. Enter an address: type the street, city, state, and zip. The map updates to show the location.
-
Click Save.
Result
The entry is saved with its location. It now appears on the event map as a marker, in addition to appearing in the logbook list. Users viewing the map can click the marker to see the entry details.
Tips
- Clicking the map is the fastest method for most situations. The reverse-geocode fills in the address fields automatically.
- Entries with locations are visible across tools. A logbook entry posted by the operations team with a location shows up on the map for everyone (logistics, planning, leadership) without anyone needing to re-enter the information.
- Not every entry needs a location. Reserve it for entries where the "where" matters: incident sites, road closures, resource staging areas, shelter locations. Routine communications don't need geographic context.